How To's
1.1 How to Create a Workspace
- Create your workspace by clicking on the Create Workspace


2.1 How to Add a GitHub Connector
- Add a Github connector to a created workspace
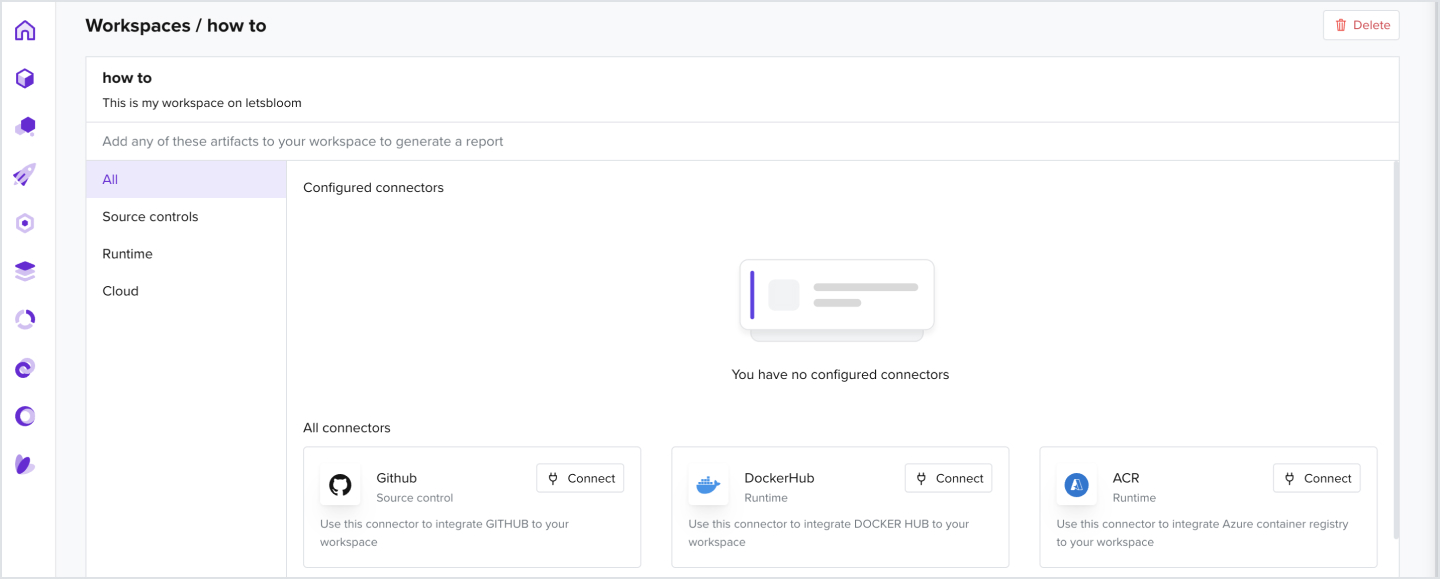
- Add a GitHub username and a personal access token that has repository read permissions
- For more information on creating a personal access token, look up this link

- Select the Repository and Branch and click Save
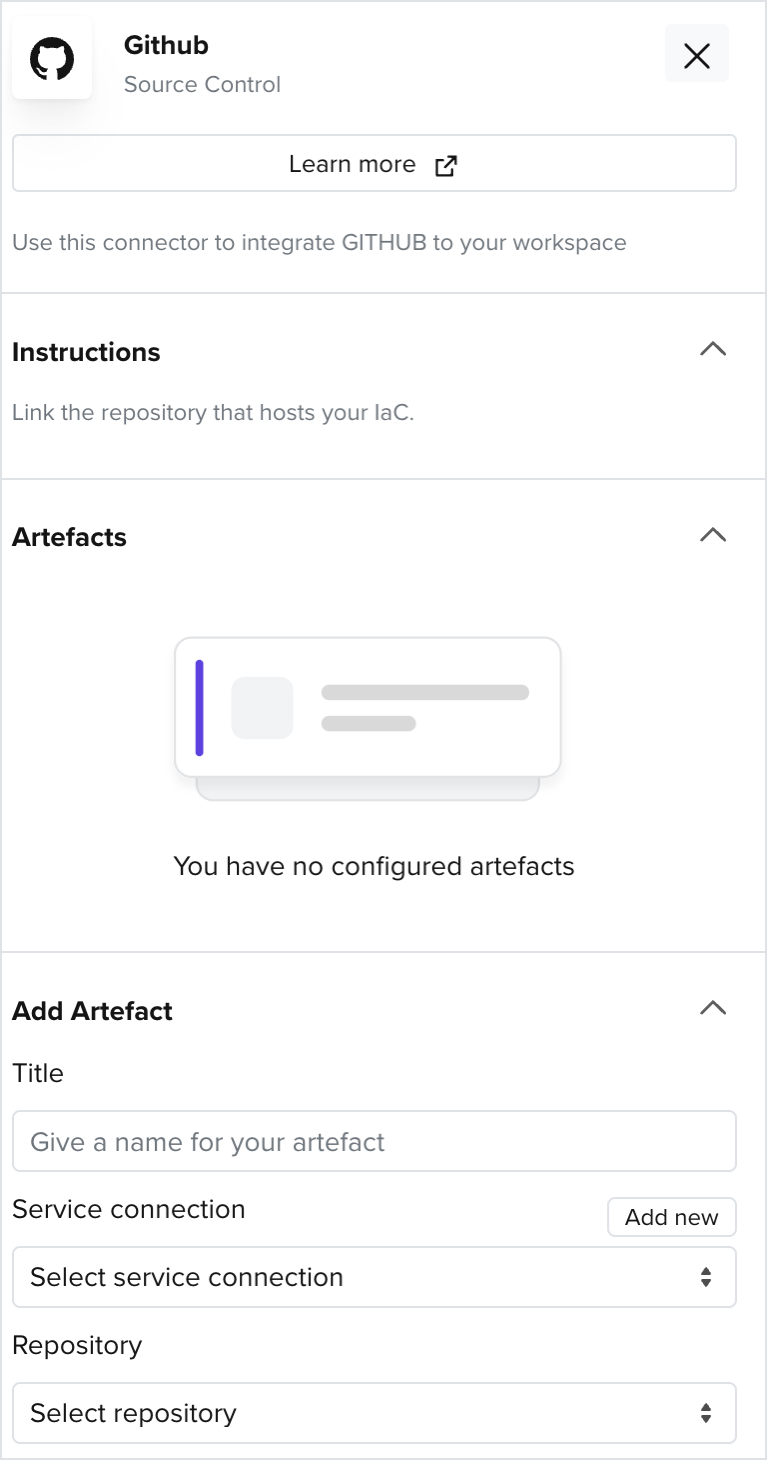
- Git hub should now be successfully added as a valid artifact

2.2 How to Add a Docker Hub Connector
- Add a Docker Hub connector to a created workspace
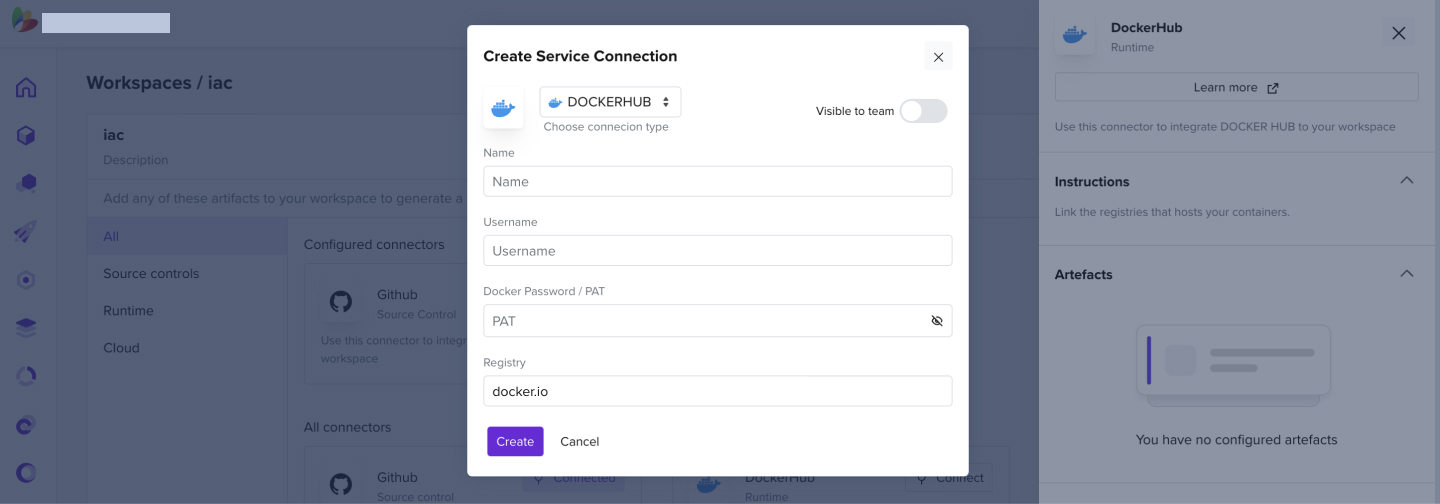
- Add a Docker Hub username and a personal access token that has repository read permissions
- For more information on creating a docker hub token, look up this link
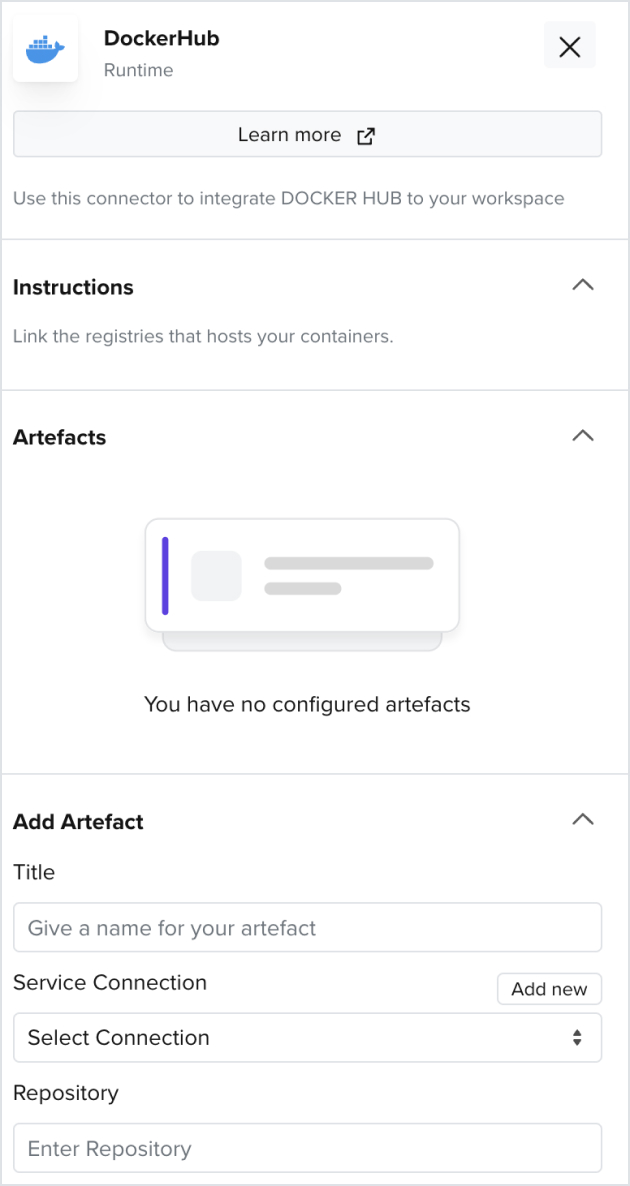
- Enter the Repository and Tag information of your docker containers
2.3 How to Add an AWS Connector
- Add an AWS connector to a created workspace

- Enter the AWS account ID you wish to connect to
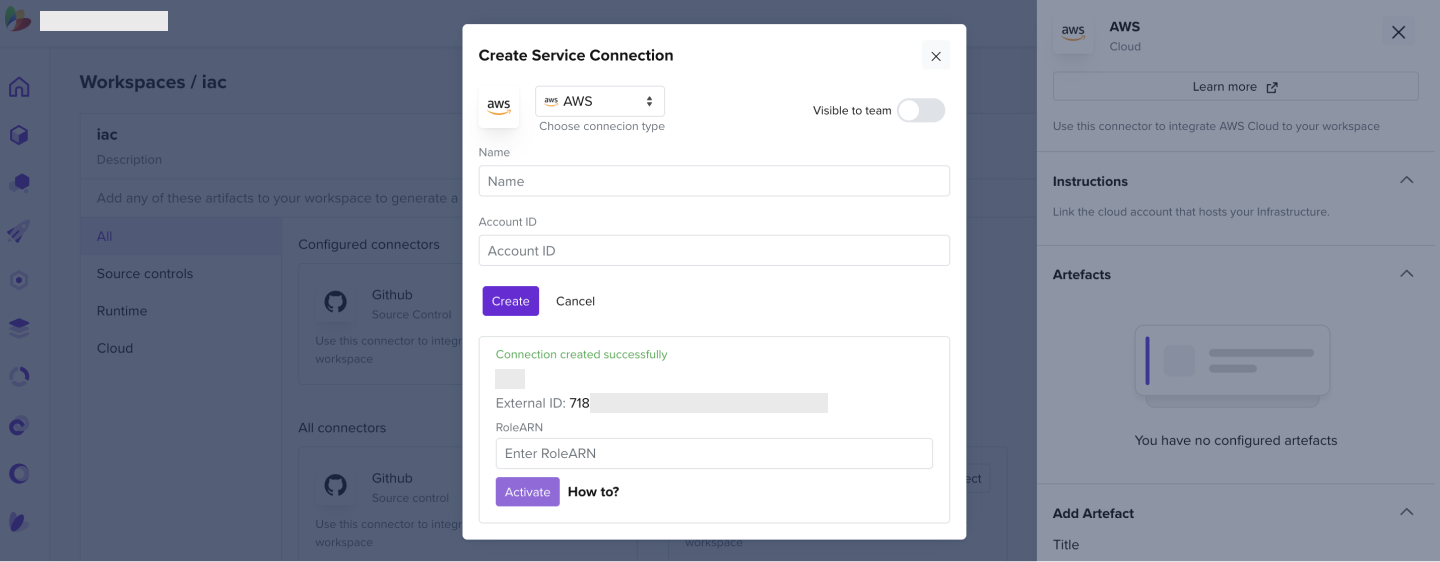
- In your AWS account under IAM > Roles > Create Role
- Select AWS account as the Trusted entity type
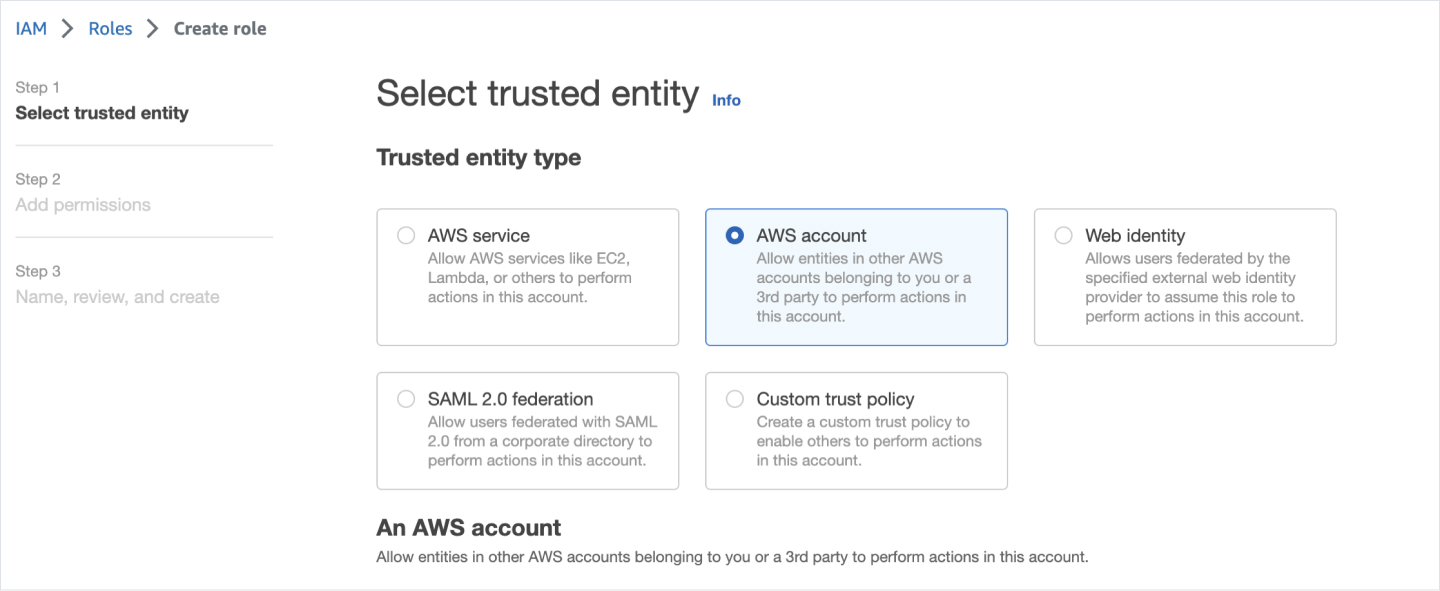
- Give this account id "418523410026" as the Identifier
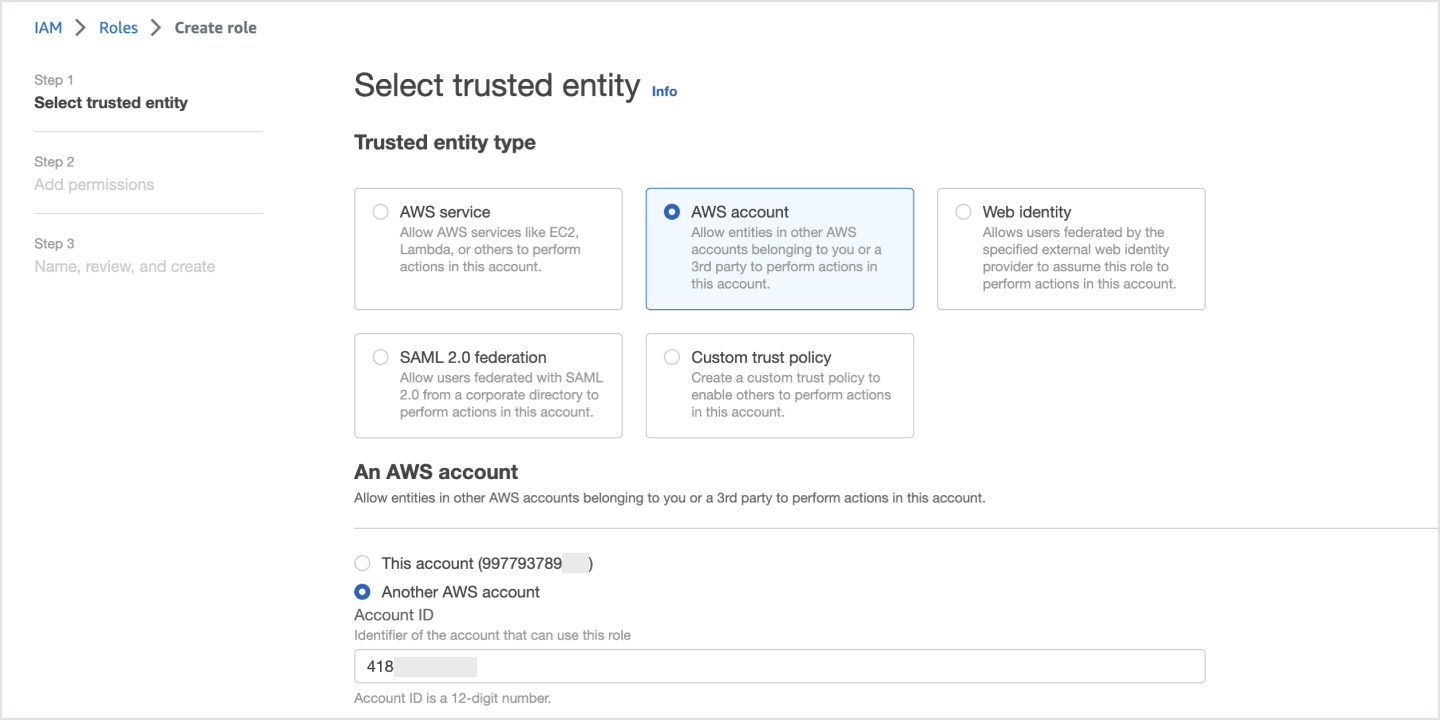
- Check the External ID option
- Give the External Identifier as displayed on the letsbloom AWS connector tab

- Select ReadOnlyAccess as the Policy Name

- Enter the Role name

- Create the role

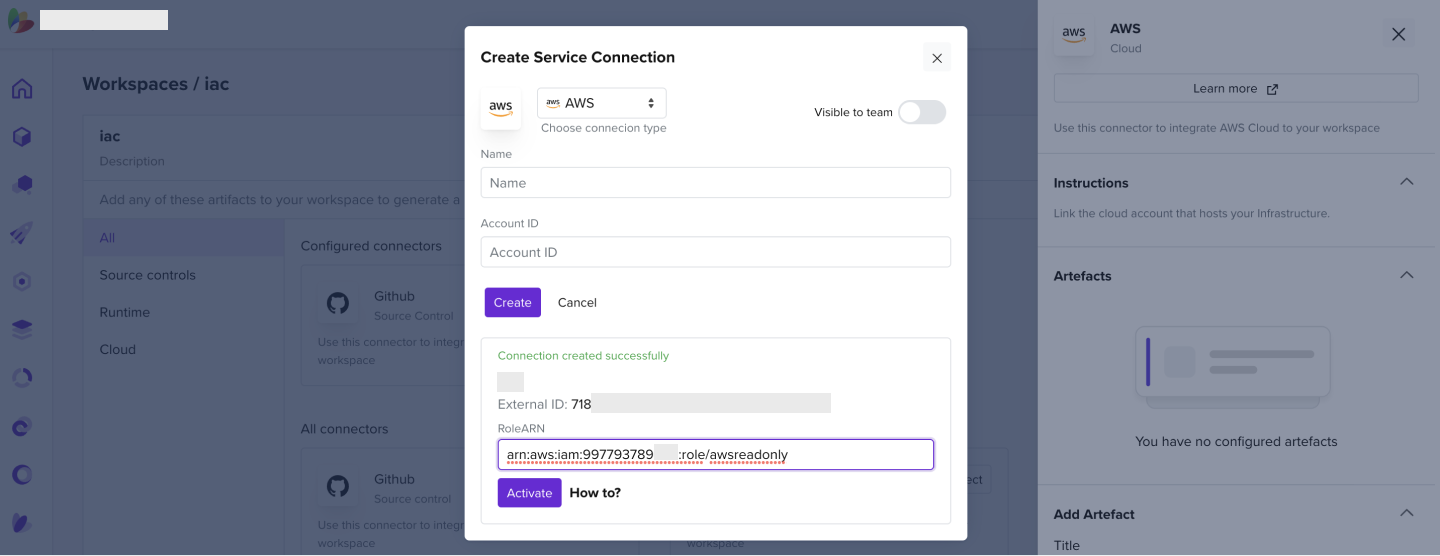
- Copy the Role ARN

- Enter it into the Service Connection tab and click Activate
2.4 How to Add an ECR Connector
- Add an ECR connector to a created workspace
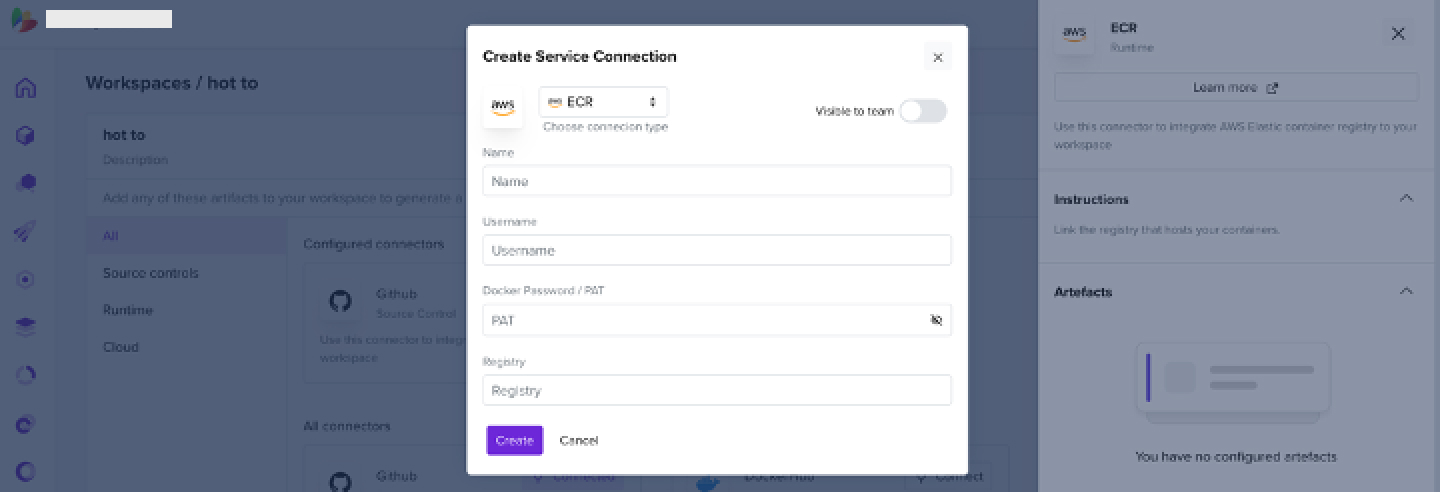
- In the Username field, enter AWS
- In the PAT, enter your password
- In the case of ECR, it would be the output of the below command
aws ecr get-login-password --region <region-name>
- The registry would be
<cloud accound id>.dkr.ecr.<the region of your ecr>.amazonaws.com
- Click Create. Your connection should be validated successfully provided you have "ECR read" permissions to the role definition
Note: AWS sets the password expiry to 12 hours to access ECR
2.5 How to Add an Azure Subscription
Using the Azure Portal
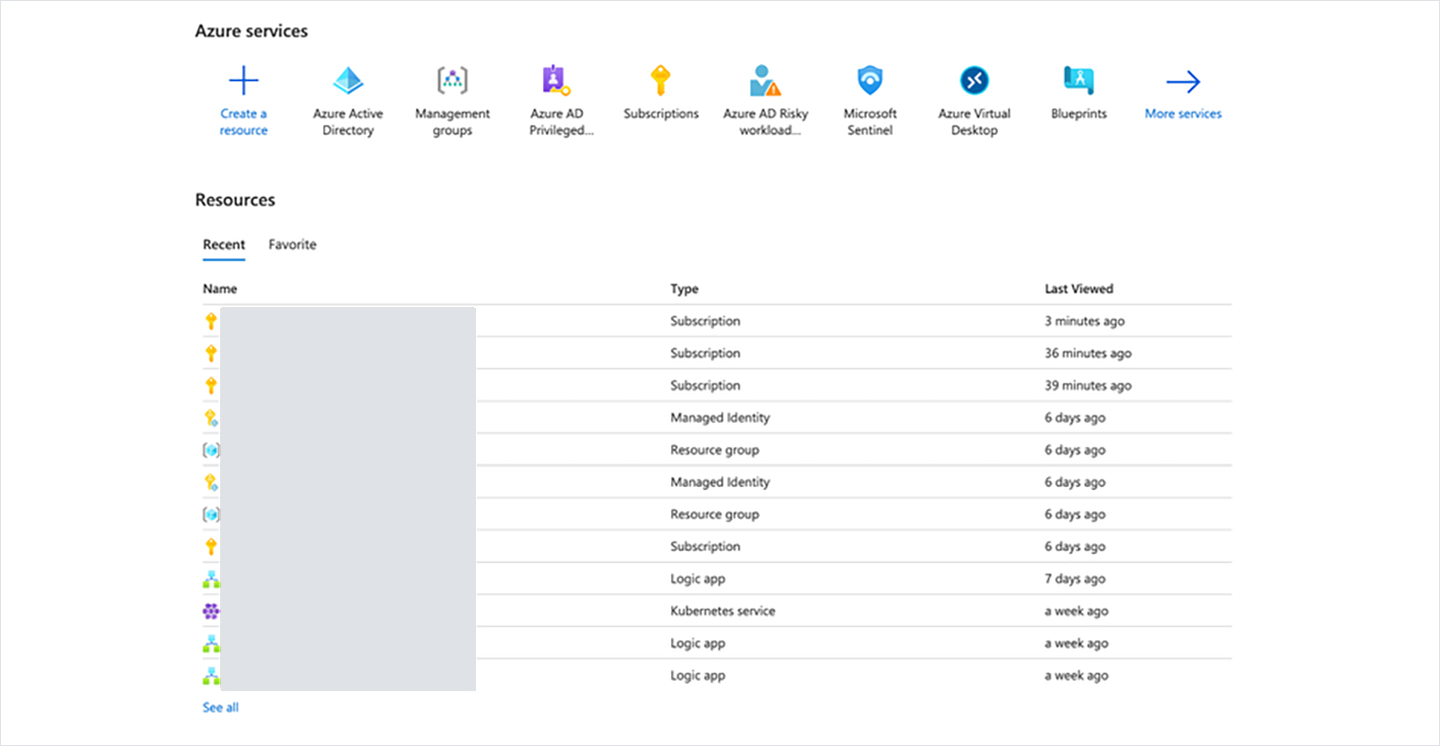
- Navigate to Azure Active Directory and click on App registrations
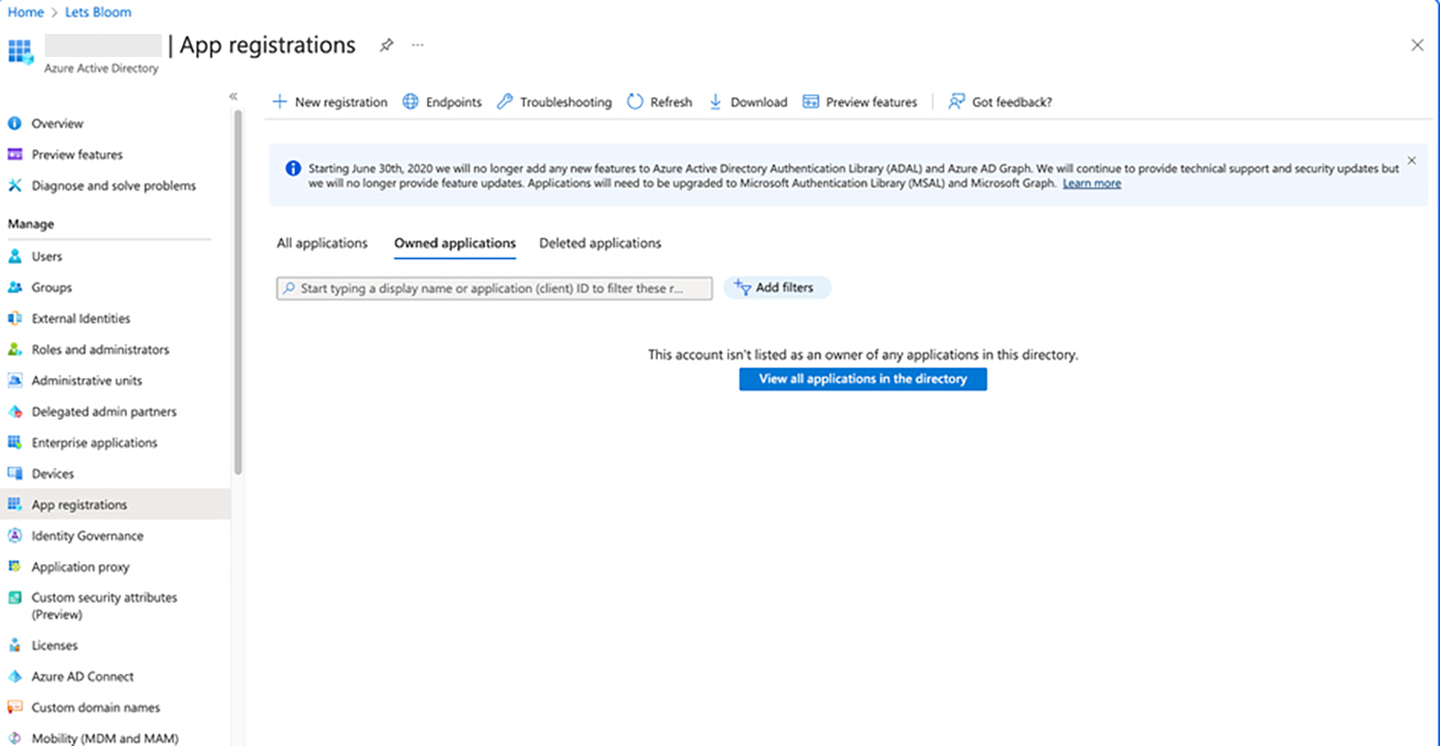
- Click on New registration
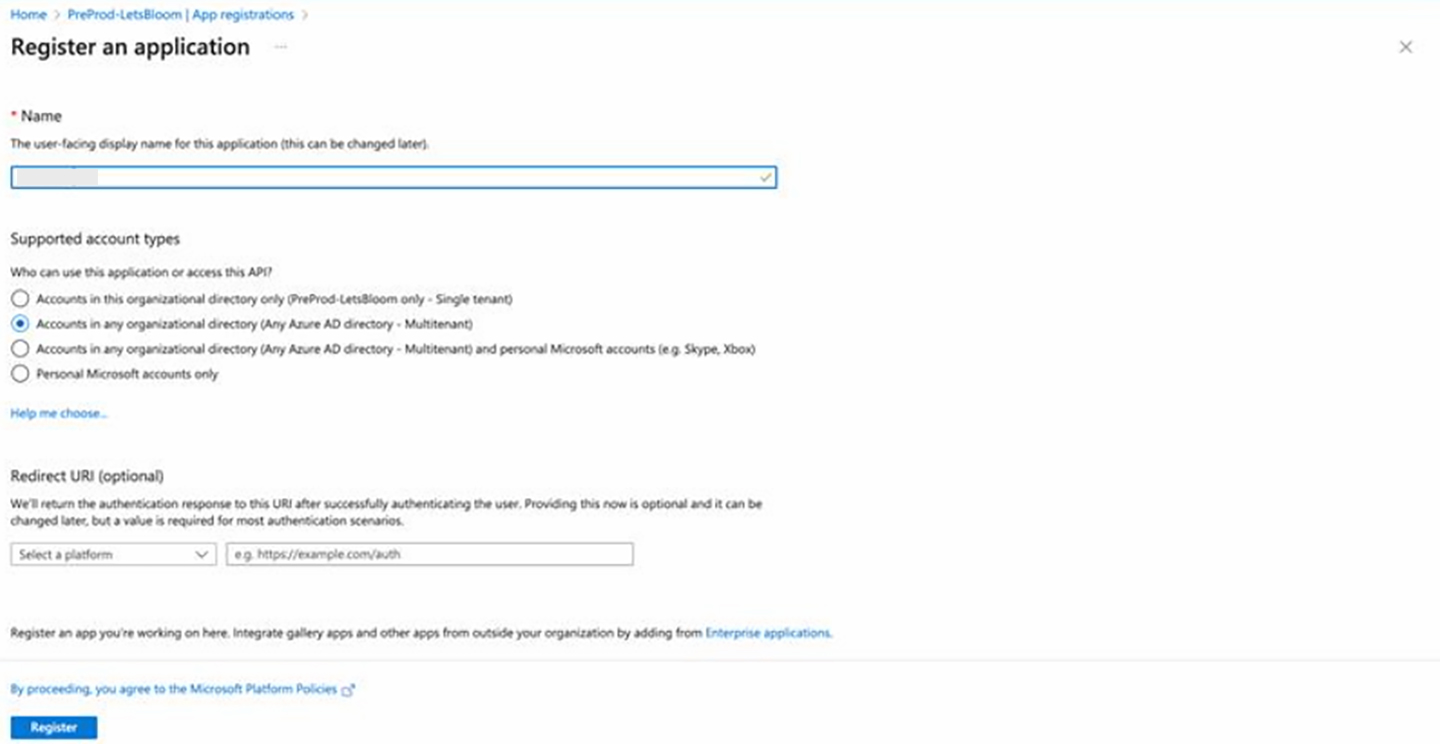
- Enter the Name (ex-cloudapp) and select Supported account types as "Accounts in any organizational directory (Any Azure AD directory - Multitenant)"
- Click on Register.
- Navigate to Certificates & secrets
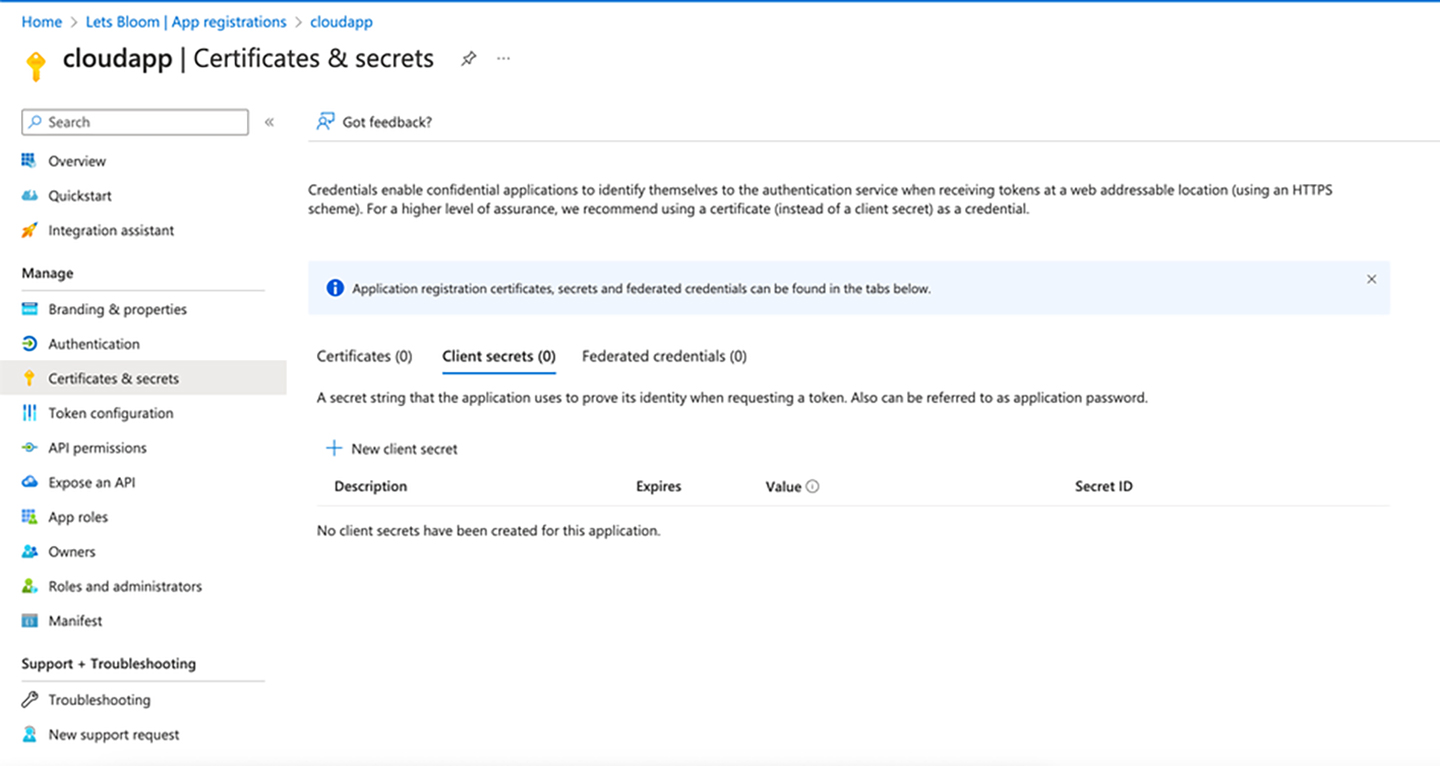
- Click on new Client secret. Add the Description and select Expires as 12 or 6 months. Click Add
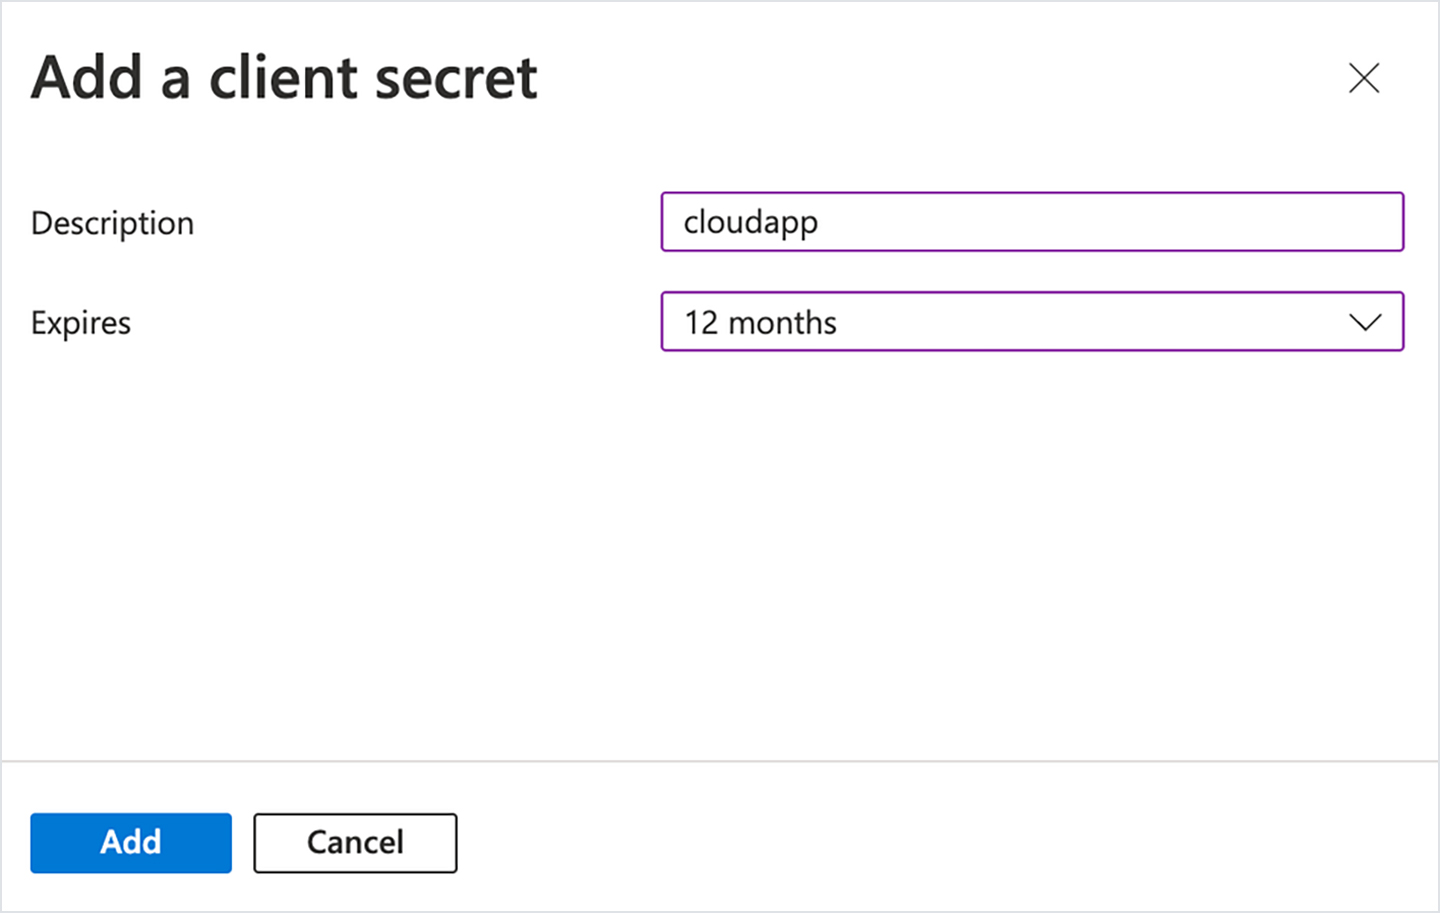
- Note down the Value and Secret ID
- Now go to the respective subscription
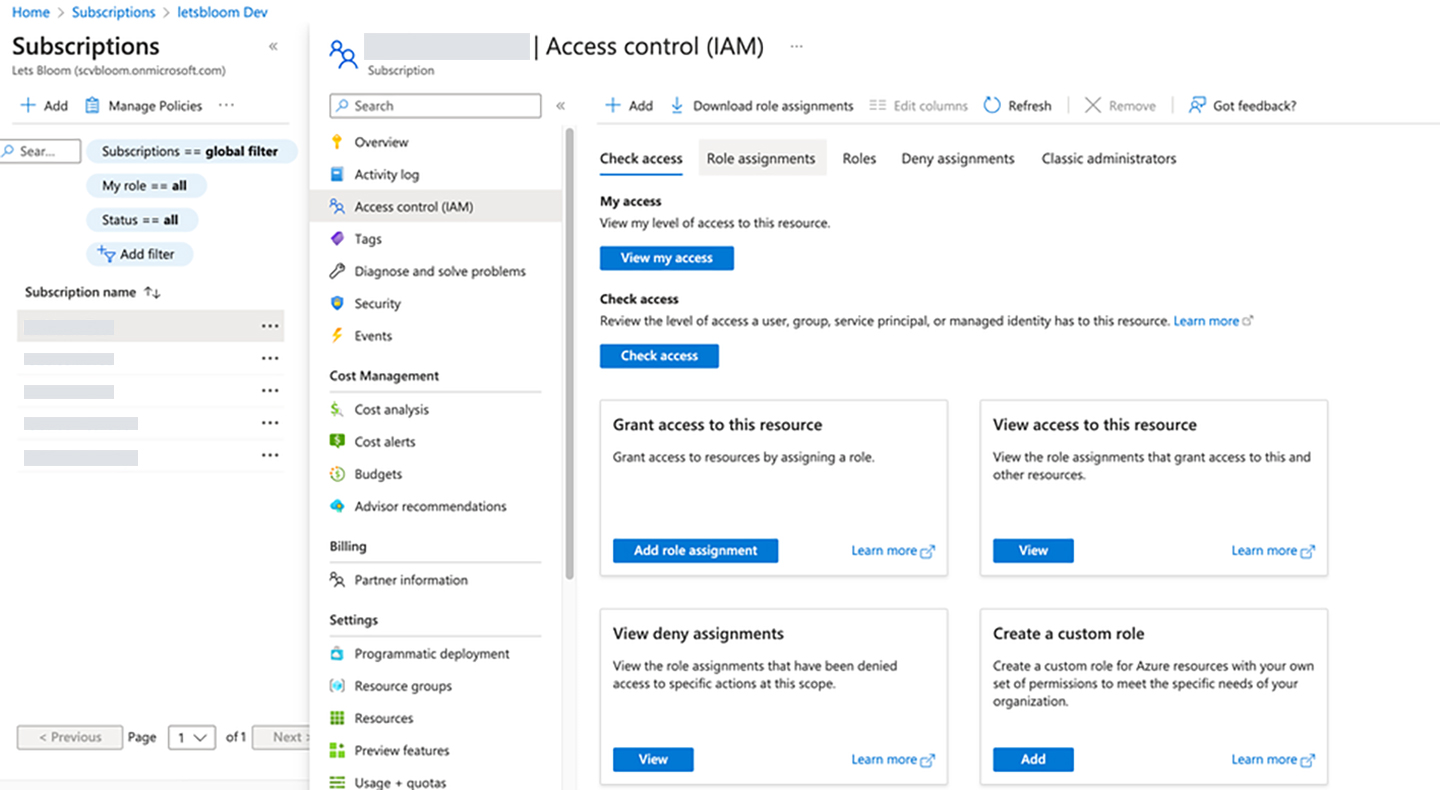
- Assign a Reader role to the created app
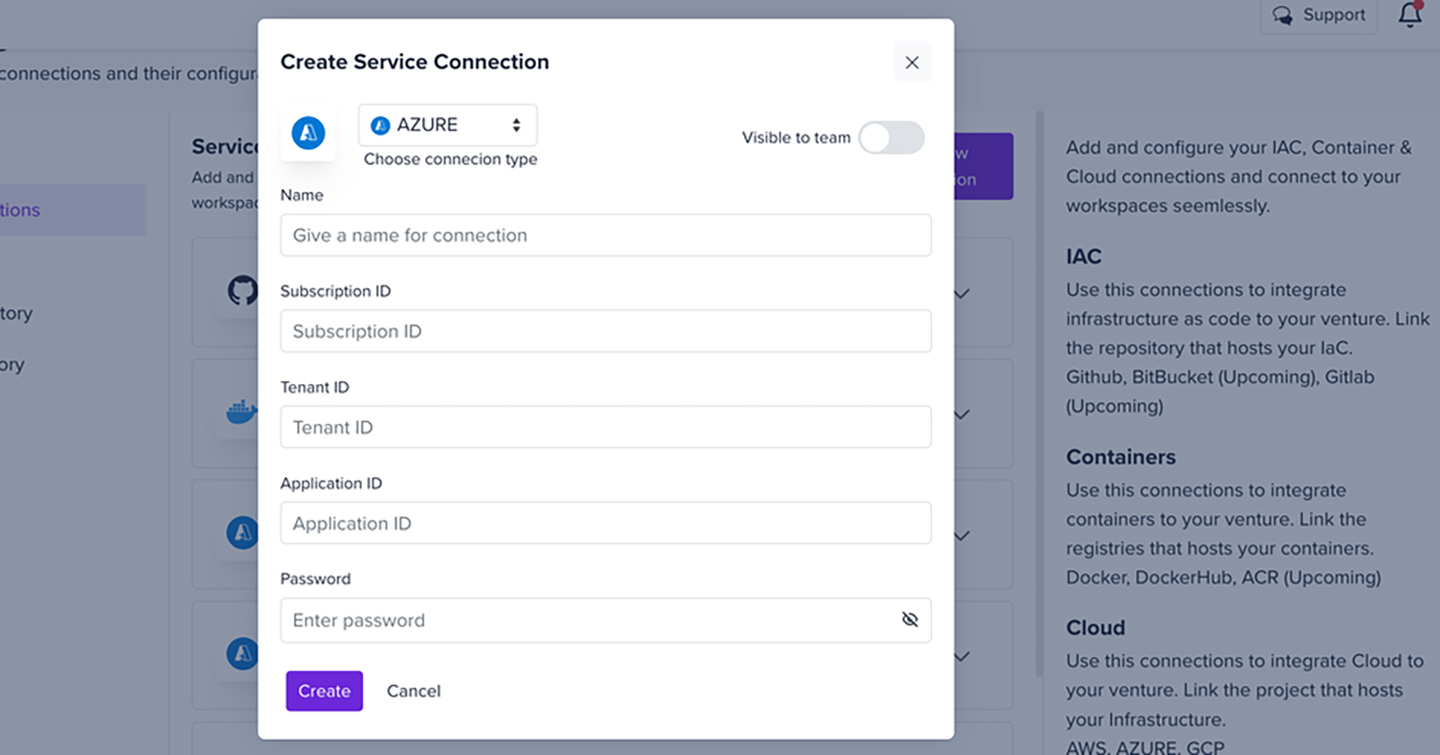
- Take a note of the following
- Application (client) ID
- Directory (tenant) ID
- Subscription ID
- Secret ID (password)
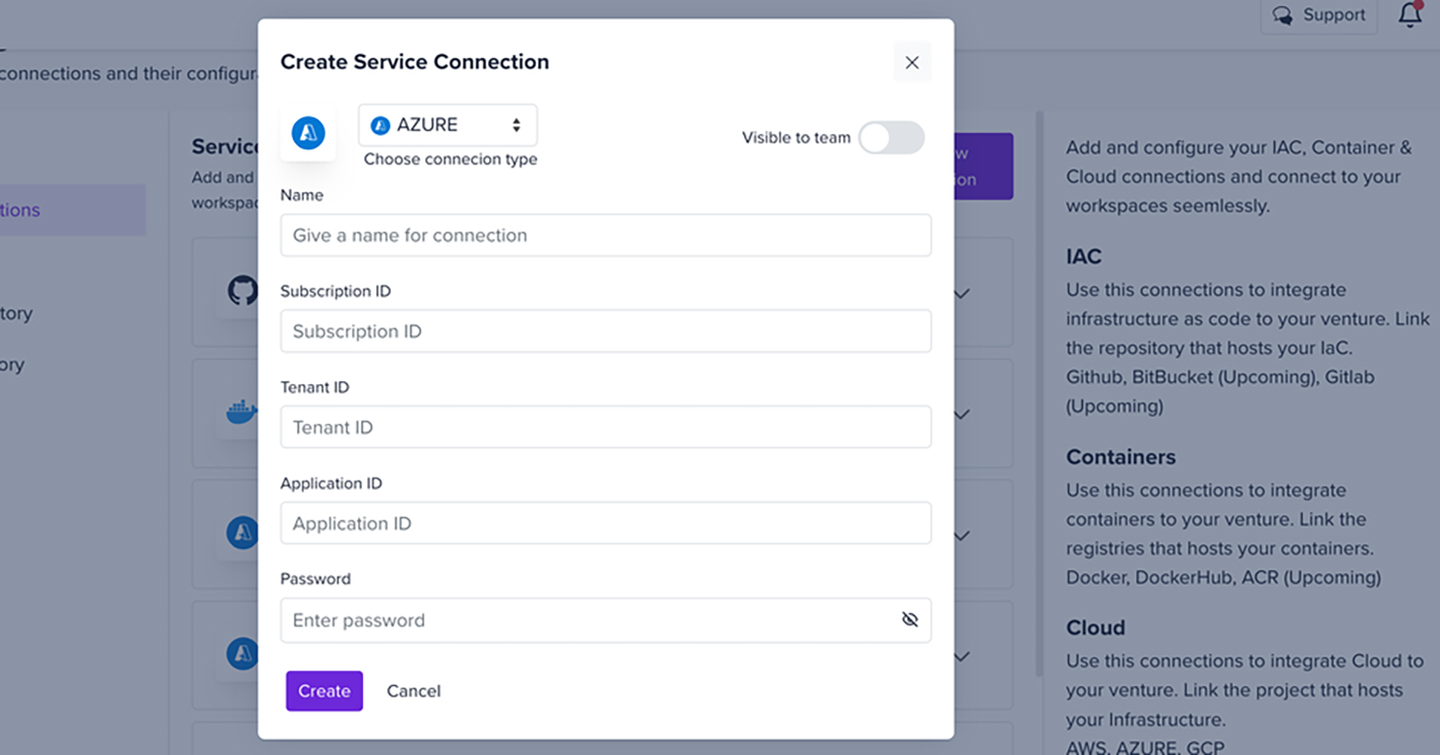
- In the letsbloom portal, enter the below details to create a Service Connection
Using the Azure Command Line
- Login to Azure using the CLI with az login
- Run the below commands
SUBSCRIPTION_ID=<set subscription id here>
az account set --subscription $SUBSCRIPTION_ID
az provider register --namespace 'Microsoft.Security'
az ad sp create-for-rbac -n cloudapp --role reader --scopes /subscriptions/$SUBSCRIPTION_ID
- Take a note of the following
- Application (client) ID
- Directory (tenant) ID
- Subscription ID
- Secret ID (password)
- In the letsbloom portal, enter the below details to create a Service Connection
3.1 How to Generate a Compliance Report
- Under a workspace that has artifacts attached, click Initiate Scan

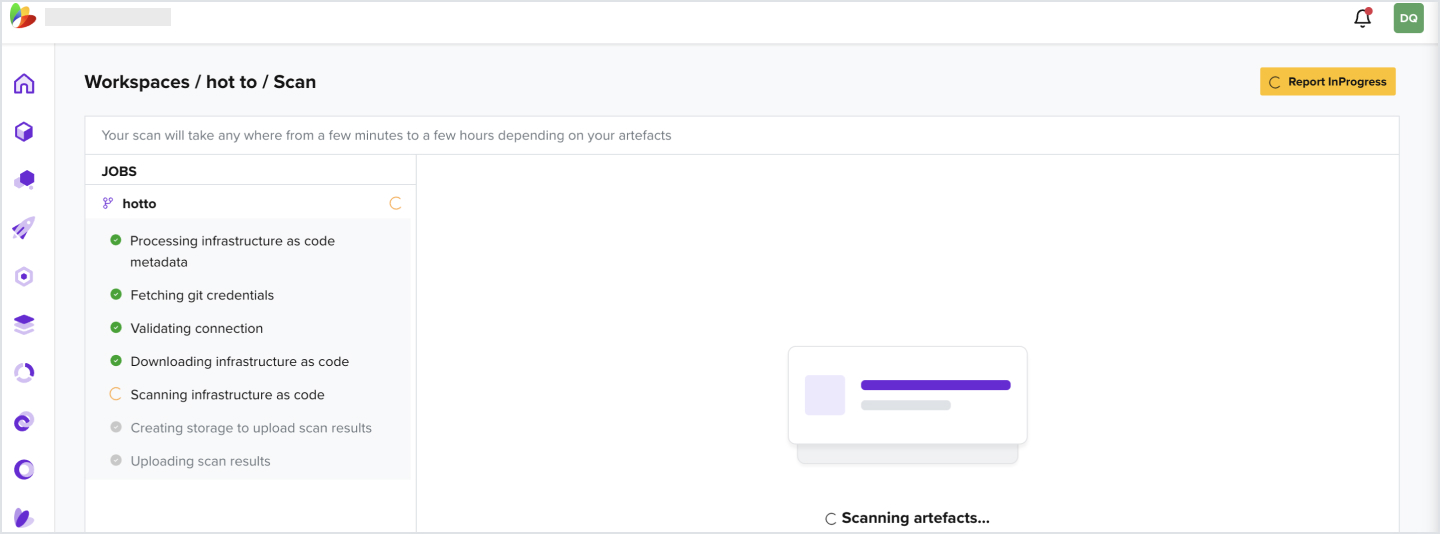
- Click View Logs

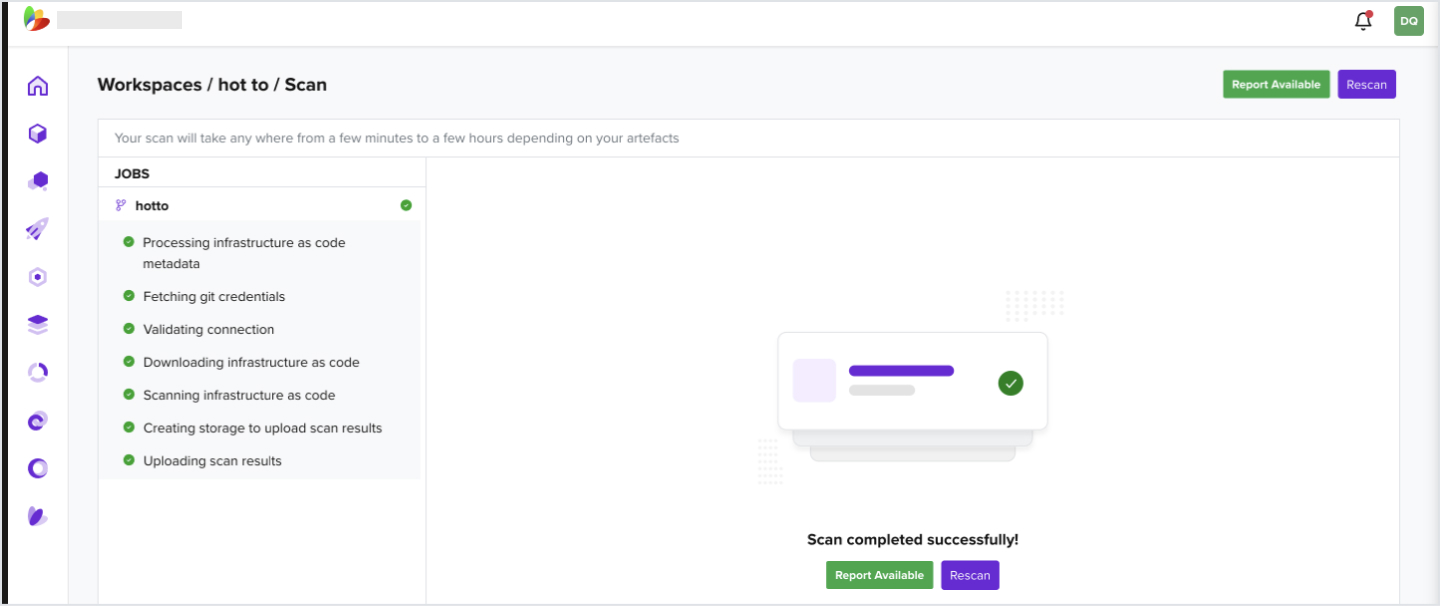
- Wait for scan to complete
- Click View Report
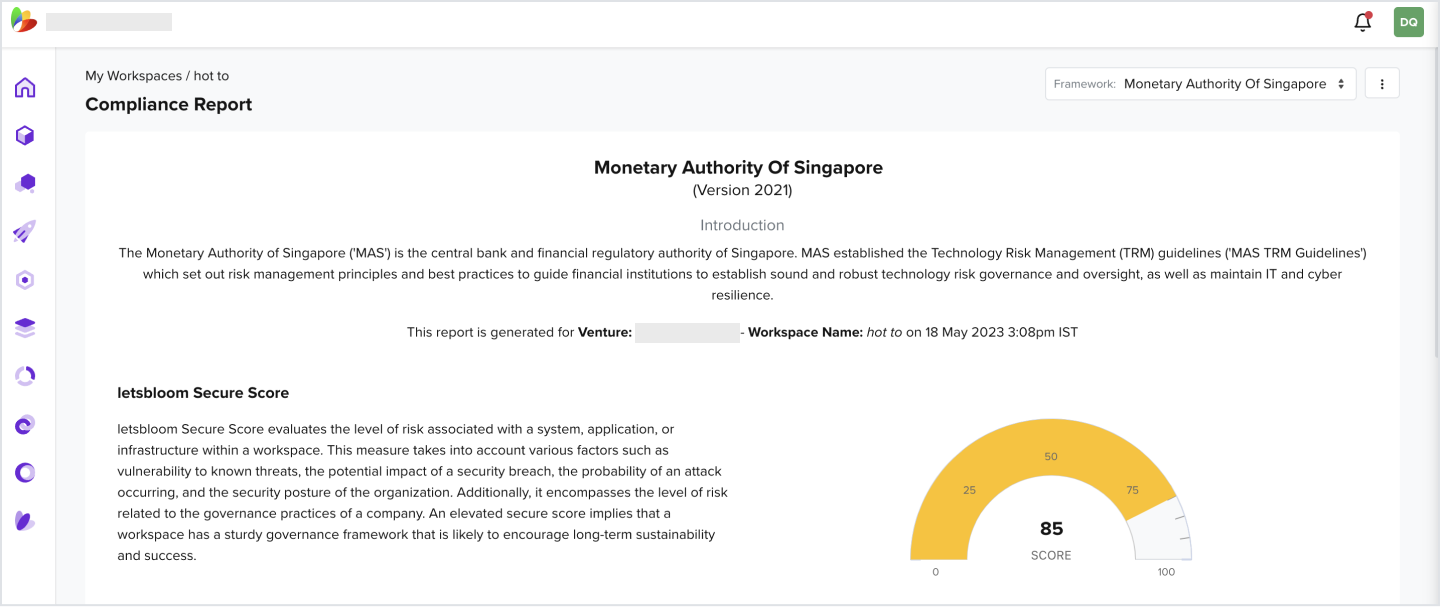
- You should be able to view the reports
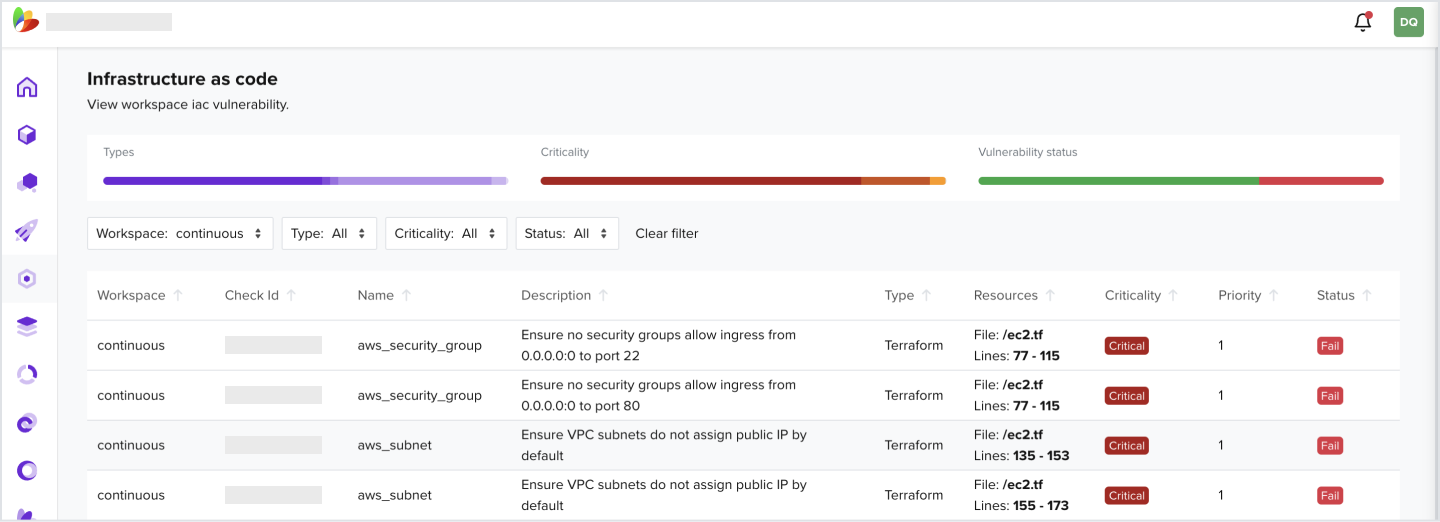
3.2 How to View All IaC Findings
- In the Navigation bar, click on IaC
- Filter by your workspace
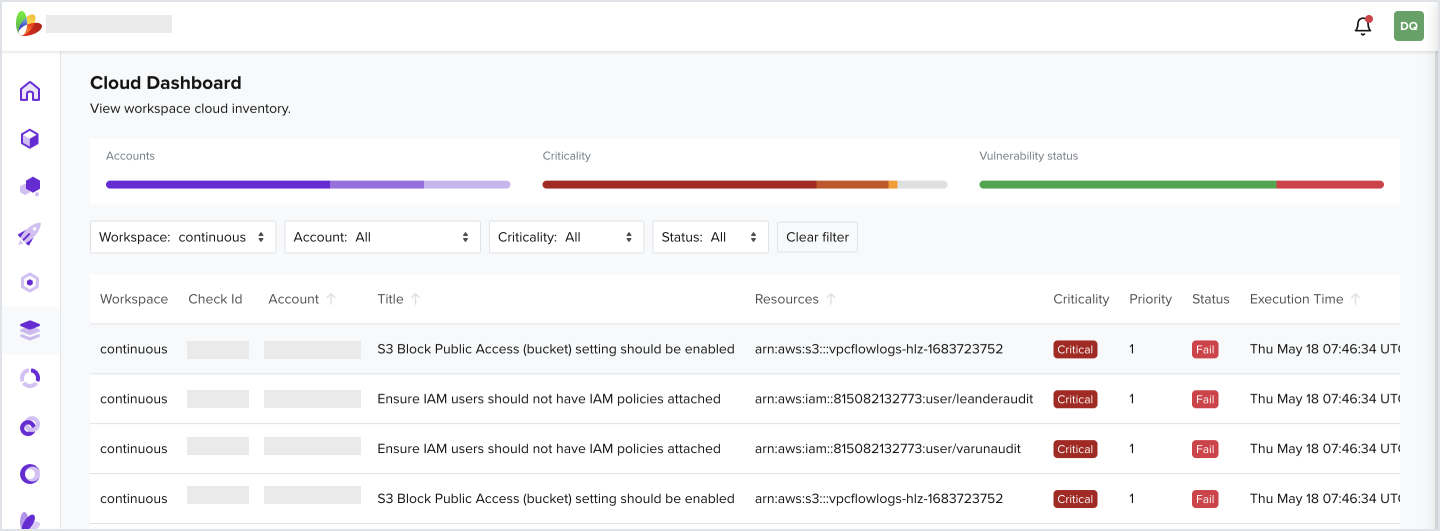
3.3 How to View All Cloud Findings
- In the Navigation bar, click on Inventory
- Filter by your workspace
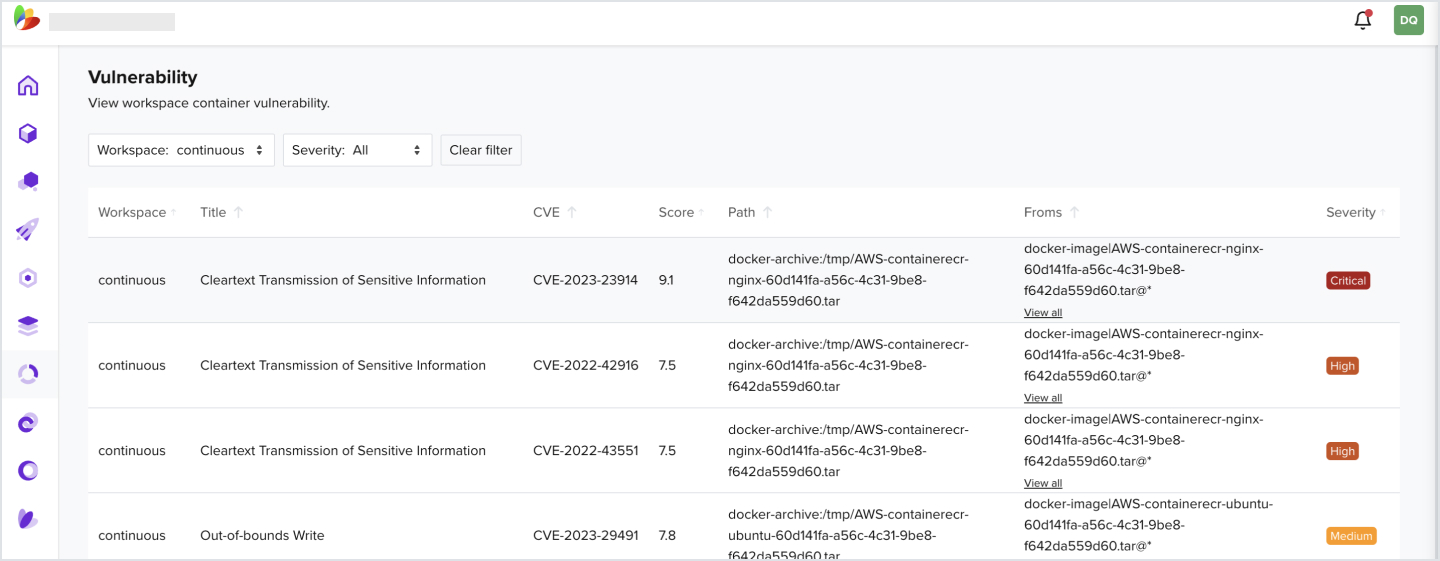
3.4 How to View All Container Vulnerabilities
- In the Navigation bar, click on Vulnerability
- Filter by your workspace
4.1 Create a New API Key
- Under your user profile tab on the right, navigate to My Account

- Click New API key
- Enter a Description and select key Validity

- Copy the generated key
- Navigate to your created workspace that you would like to scan on push
- From the address bar, select the workspace Identifier
.letsbloom.io/workspace/e2703XXXXXXXXXXXXXXXXXXXXXXX
- Navigate to Venture Settings
- Copy the Venture ID
Venture Settings - Ofcdce3c-XXXX-XXXX-XXXX-XXXXXXXXXXXX
4.2 Initiate a Scan from CI/CD Pipeline
- Now from your CI / CD pipeline that is mapped to the source control attached to the workspace, make an API call as one of the tasks
- For example, in Azure DevOps that would be a task in the pipeline

- The API call would look like the below
curl --location --request POST "https://api.prod.bloom.tech/inventory/v1/ventures/ < Venture ID >/workspaces/< workspace Identifier >/scan" --header "API-X-KEY:

